Rail Alignment Gauge

Maxim Lase Align MKII


Track Laser Alignment Gauge


Switch tip alignment made simple and accurate without the need for tape measurements and calculation.

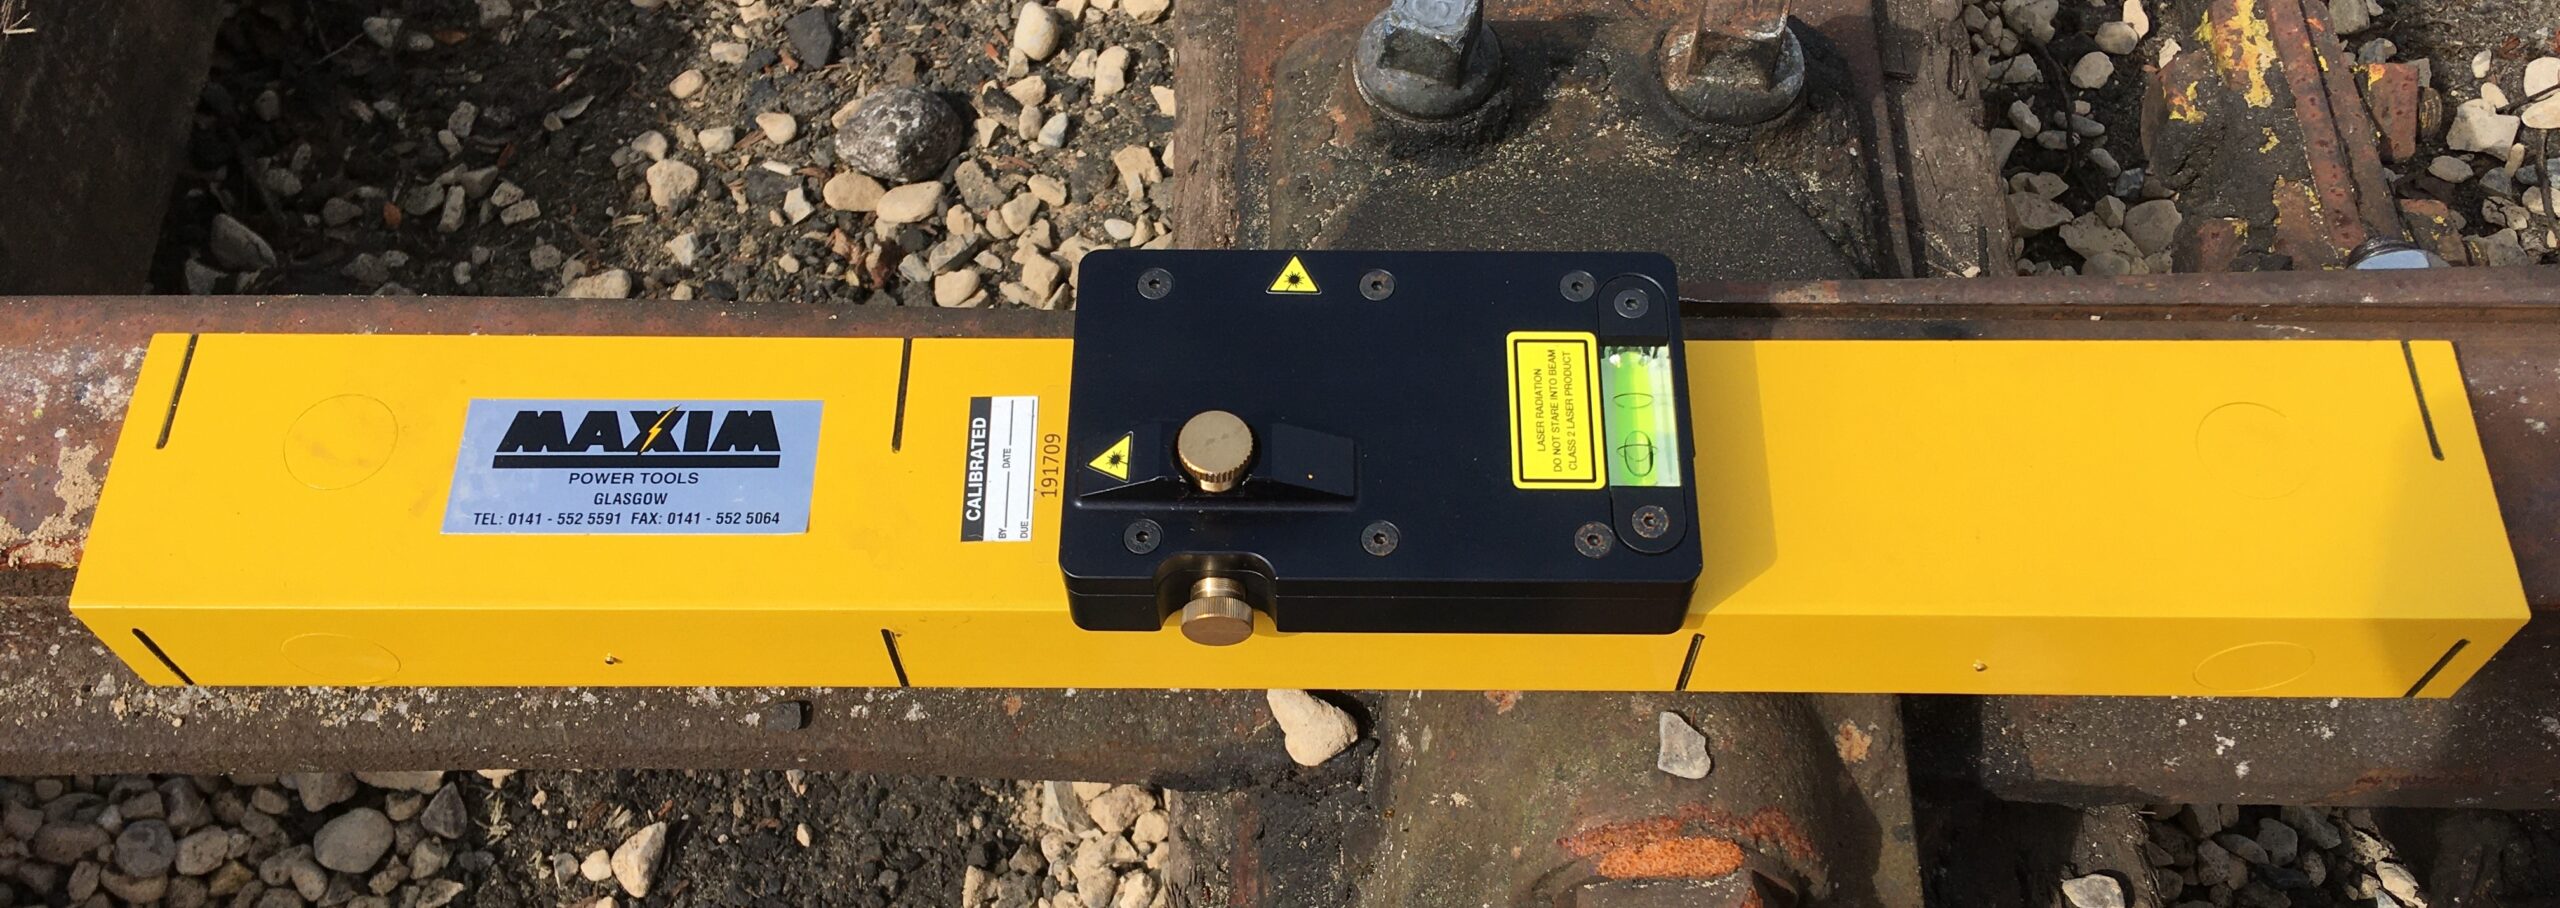
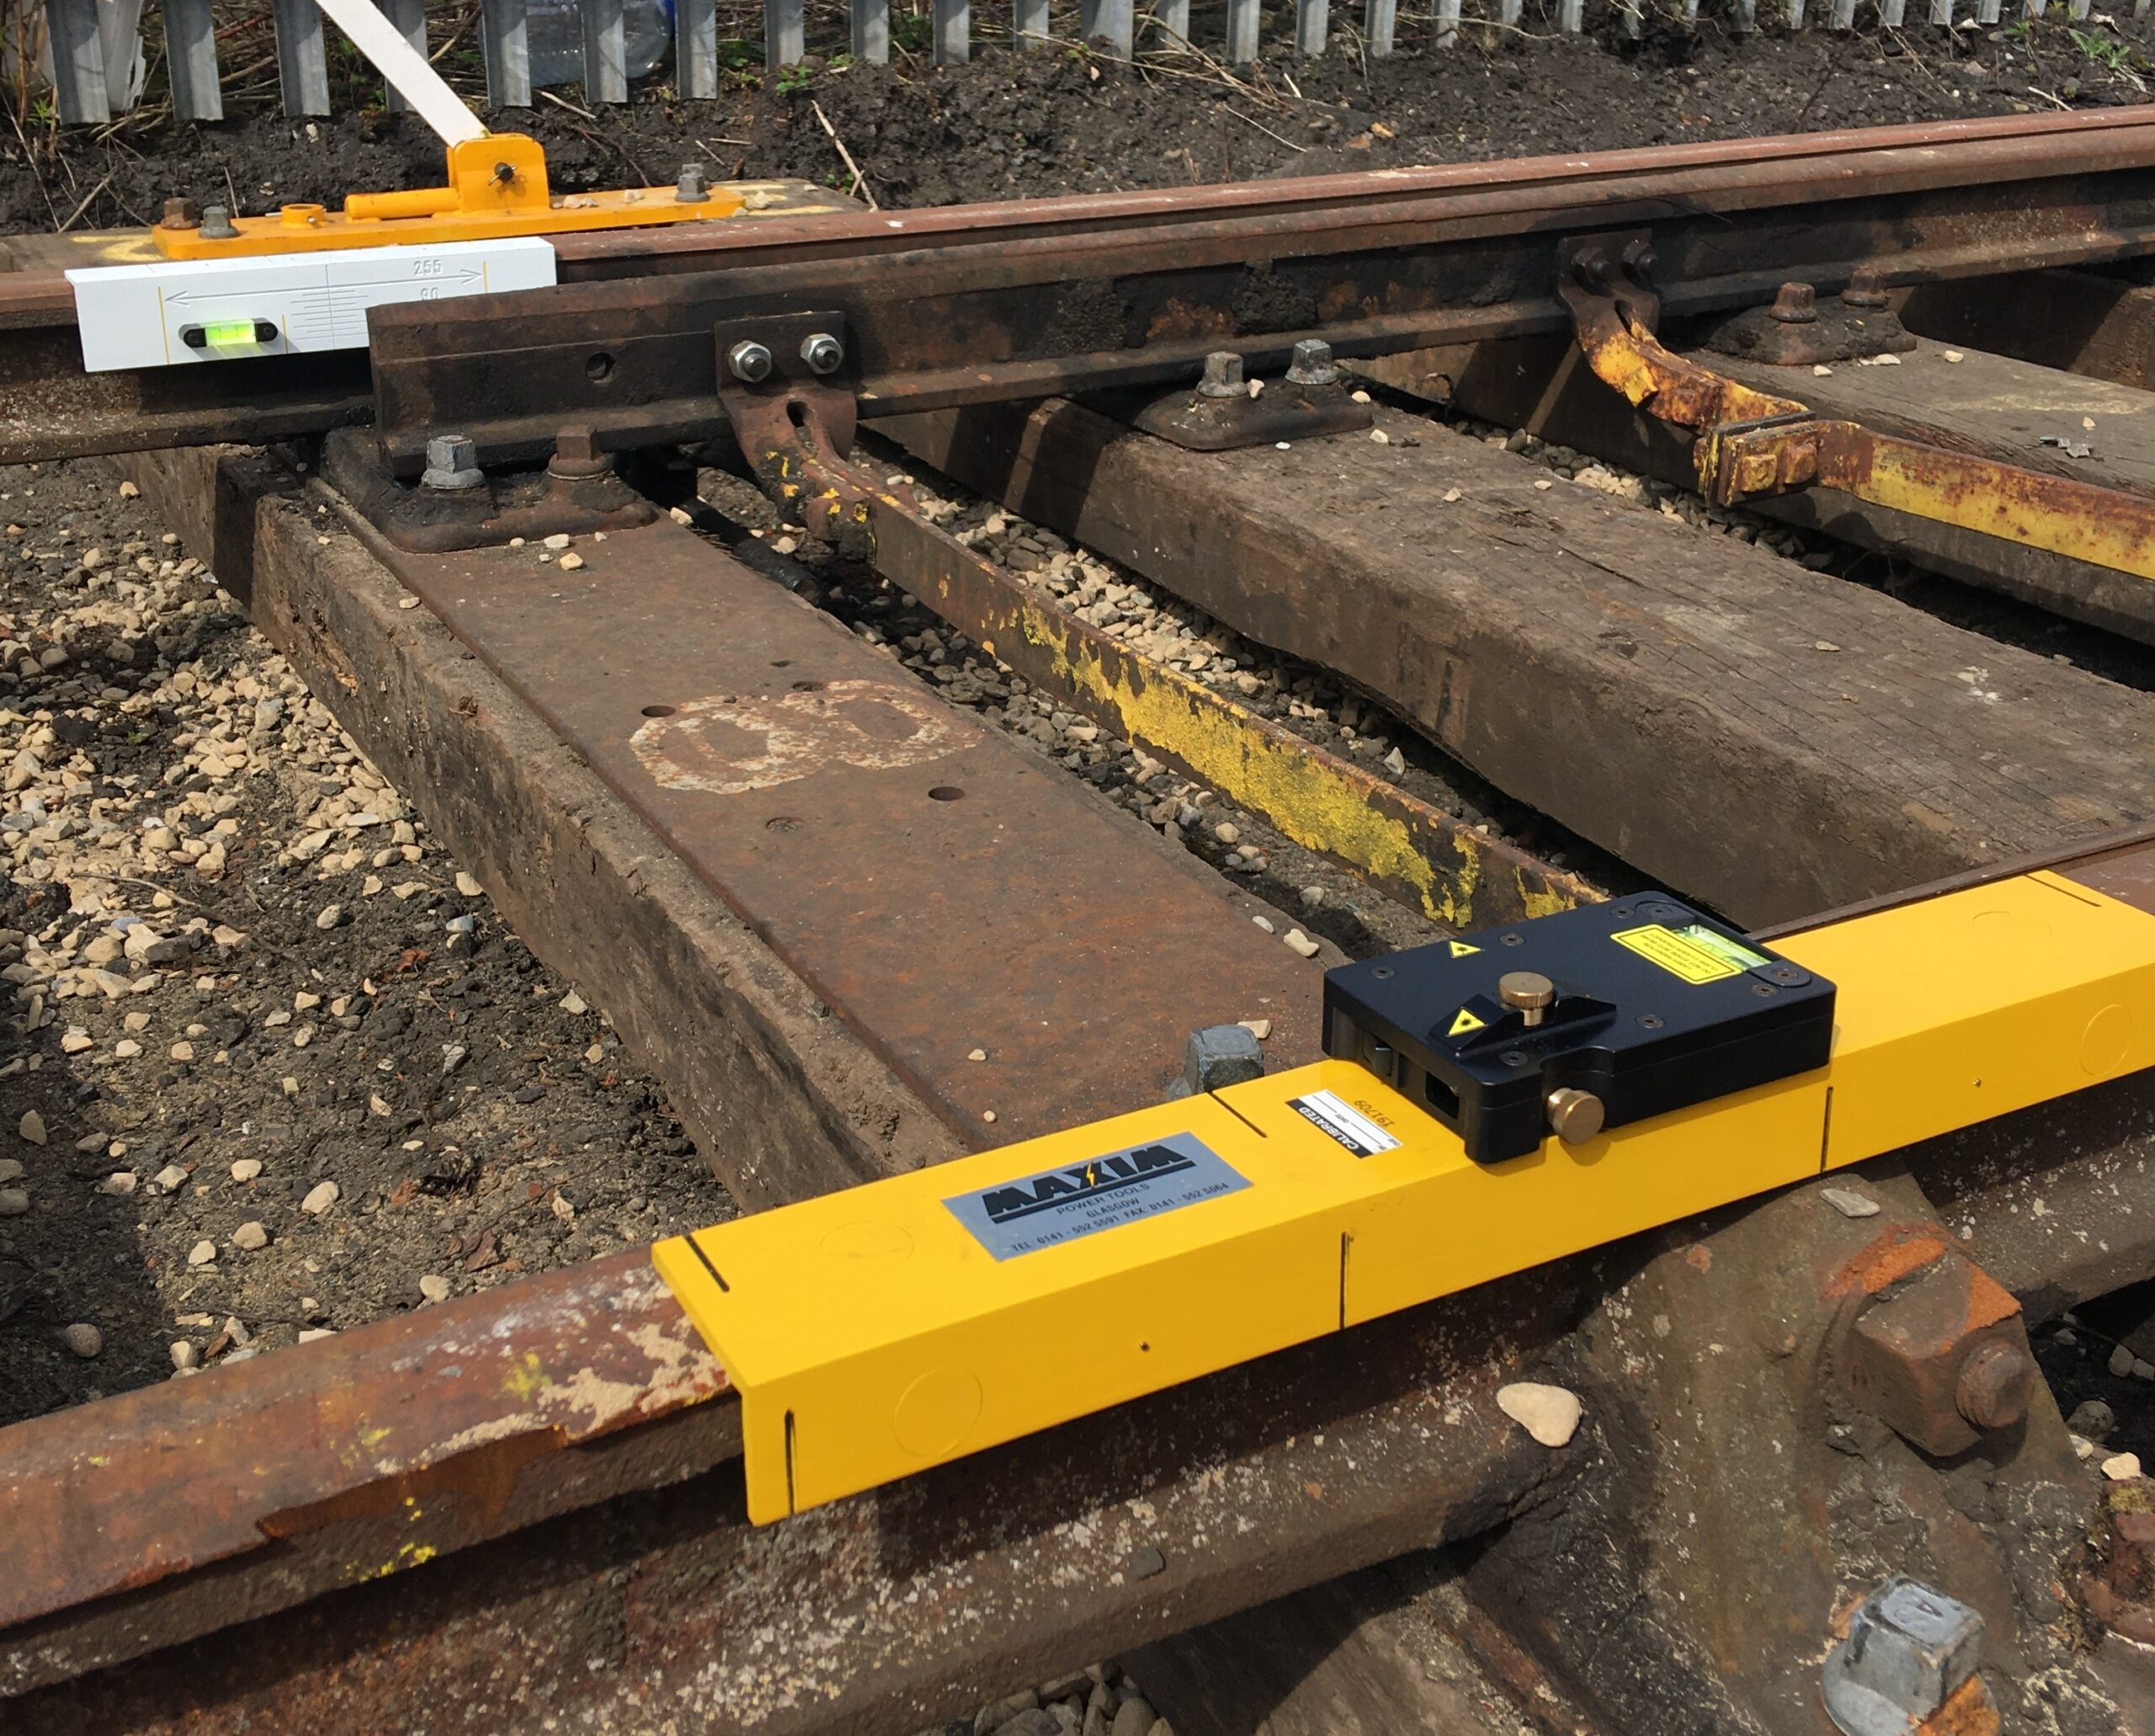
Simply apply to rail head on one rail and the spot indicates the point directly opposite.

Twin laser heads mounted in a solid metal frame ensure total accuracy and reliability.

Magnets ensure accurate placement.

Correct Positioning Of Drill Holes


Fix Lase Align Unit over first hole centre line. Turn on laser and the red dot will indicate exactly where on the opposite rail hole should be drilled. Mark rail accordingly.

Adjustment Of Switches


Alignment checked in seconds.

Rail Dip Measurement


Between two datum points is clear and accurate, and easily done at night without the need for heavy lighting.

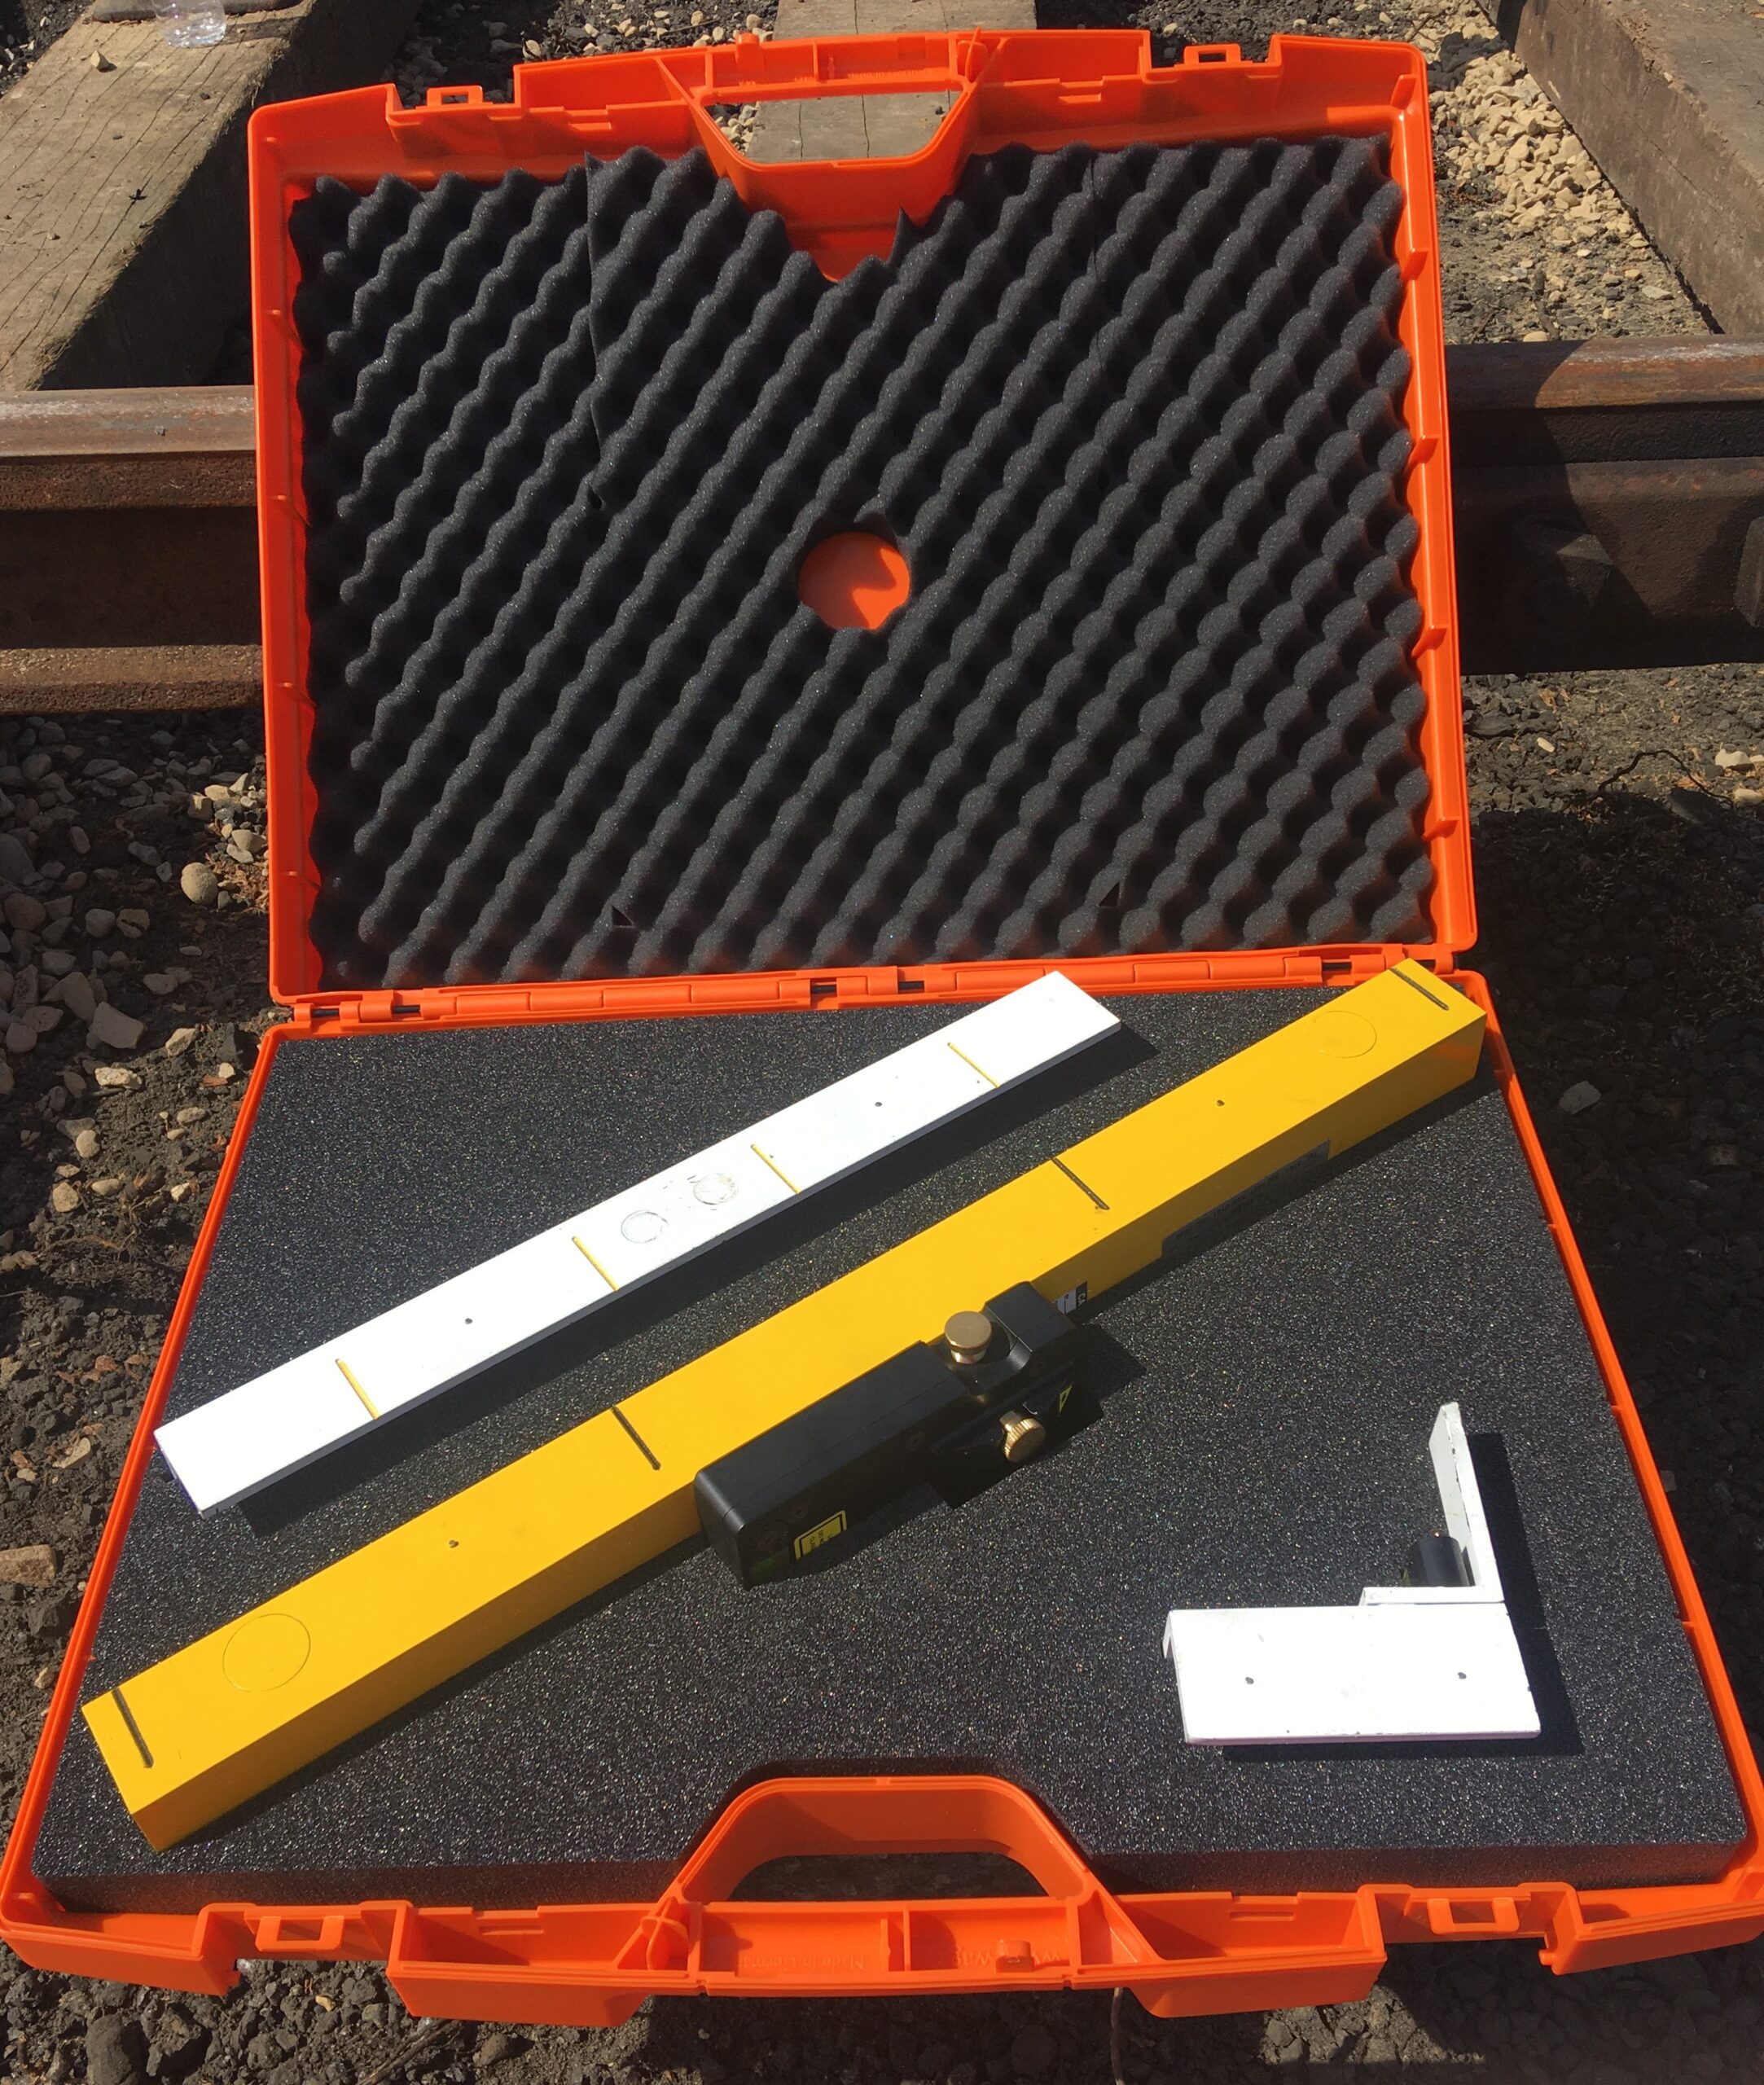
Targets supplied to suit 90mm and 255mm tip to bolt centre Targets for nose alignment using the fixed laser and rail dip using the adjustable laser are included in the kit.

Second adjustable laser can be set to the centre of the Large Target. Bringing the target to intermediate points will give an accurate measure of Dip for stone blowing or shovel packing.

Laser Specifications

Class 2 Lasers For Safety


LASER SPECIFICATIONS
Wavelength 650mm
Power 0.9mW
Requires 2 x AA Batteries
OVERALL DIMENSIONS
Length 530mm
Width 80mm
Height 65mm
Weight 800 grams

Lase-Align Rail Alignment Gauge

User Instructions


LASE-ALIGN CALIBRATION

Securely fix a short piece of new rail to the floor or fixed bench parallel to and 1435mm away from a vertical face such as a wall.

Make a vertical permanent mark or cut on the side of the rail head which is facing the wall at its centre.

Place Lase-Align on rail, aligning the notch with the mark on the rail head and switch on the laser pointing towards the wall.

Fix the self-adhesive target supplied to the wall with the red dot positioned exactly on the centre cross of the target.

Before use, the gauge can be checked for accuracy on the calibration rail. Check fixed laser to ensure that it is within the required field of accuracy.

Safety


NEVER look directly at the laser beam.

NEVER shine the laser at anything other than the rail faces and particularly not towards another person.

NEVER point the laser towards oncoming trains or vehicles as the light can obscure the drivers vision.

ALWAYS switch off the lasers when not in use

ALWAYS return the gauge to its protective case when not in use.

Applications


SWITCH TIP ALIGNMENT

Place Lase-Align onto rail head aligning the relevant datum line (90mm or 255mm) with bearer one (toe) stock rail bolt. The integral magnets will hold the Lase-Align in place against the field stock rail face.

Switch on the laser.

Place Small Target on opposing rail with the relevant datum line with bearer one (toe) stock rail bolt.

Adjust Lase-Align on rail head until red laser dot shows on the opposing Small Target indicating the point exactly opposite.

CORRECT POSITIONING OF DRILL HOLES

Fix Lase Align Unit over first hole centre line. Turn on laser and the red dot will indicate exactly where on the opposite rail hole should be drilled. Mark rail accordingly.

ADJUSTMENT OF SWITCHES

Place Lase-Align on track with the datum in line with adjustment switch tip.

Place Small Target over opposite switch tip.

CROSSING NOSE ALIGNMENT

Measure nose to nose measurement from the switching in accordance with NR/L2/TRK/2049 and mark the rail head. Place Lase-Align on rail head with laser directly over the mark.

Place Small Target in flange way of adjacent crossing with the centre mark directly in line behind the nose.

The dot should be on the centreline of the Small Target.

RAIL DIP MEASUREMENT

Select the two datum points and place the Lase Align on first high point, use Large Target on the next high point, adjust the dot using one of the adjusting screws to position it on lowest line of Large Target, on the vertical centre line. Ensure Lase-Align base and target are both horizontal using levels fitted.

Move the Large Target towards the Lase-Align and keep it level. The dot on target will show the low points relative to datum line.

The Small Target will perform the same function as the Large Target if preferred.

Choose Your Language

Download Manual


Download the User Instruction Manual

Menu